Tuesday, October 9, 2012

Sponged Frame Technique

Still playing with the Trust God and Serene Silhouette stamp sets from Stampin'Up........

Last week, I found a video tutorial by Dawn Olchefsky at dostampingwithdawn.com about sponged frame technique that I thought was so simple and stunning I just had to try it.

I used the same color cardstock (crumb cake) and inks (crumb cake, early espresso) but the embossing folder and stamps were different.  I still have the Trust God and Serene Silhouette stamp sets on my work table so I decided to work with those.  I also used the Square Lattice EP (embossing folder) because I like it and I haven't used it in a while.

Just like Dawn's tutorial, my main image was off to the left side and the sentiment was on the bottom right corner.  I don't like using glitter because of the mess it leaves behind but Dawn used glitter on her card so I had to try it too.  I glittered the tiny birds and OMG! it made all the difference.  The card is so serene and elegant in person.  I hope I captured that in the photo.


Noticed how I made two?  'Coz one is not enough!  I'm so pleased with how they turned out I can't stop looking at them.'

Cheers!!!


Supplies used are all from Stampin'Up.
Stamps:  Serene Silhouette, Trust God
Cardstock:  Crumb Cake 
Inks:  Crumb Cake, Early Espresso
Embellishments: Square Lattice Embossing Folder, Dazzling Diamonds Glitter

Sunday, October 7, 2012

Inspirational Gift

Today I'm sharing my latest favorite stamp sets from Stampin'Up.

I didn't notice this set of stamps from the current Stampin'Up catalog until recently when I picked up the catalog to make a wish list for my next order.

It opened to page 136 and at the top of the page is a set that includes this "Live Simply, Love Generously, Care Deeply, Speak Kindly, LEAVE THE REST to God" and this "God is Love" with a little heart on the stylized letter d.  I love these verses and immediately decided I will get this set called Trust God.

Another new stamp set in the current catalog that I wanted since June is called Serene Silhouette.  I have seen some gorgeous samples from other stampers and I think the images are perfect with the Trust God set.

I want to use these two sets to make cards for holiday gifts for my son's CCD teachers but for now this set of cards is going to a friend who would truly appreciate the sentiments and meaning of the verses.

When I give a set of cards, I always leave the inside blank so the recipient  has plenty of spaces to write their own messages.  I selected a wide range of colors but kept the layouts similar  on a couple of cards.


This is the first card I made.  Simple almost boring, I am not too crazy about it.  I used a template as a mask for the rectangular focal point and sponged the colors.  


The second card used the same colors and image except this time I used three small rectangular foams to apply the background colors.  I have a lot of white die cut butterflies left over from another project so instead of die cutting more butterflies I sponged the white ones to match my colors.  The card base is Raspberry Ripple so I used the same color ink on the butterflies.


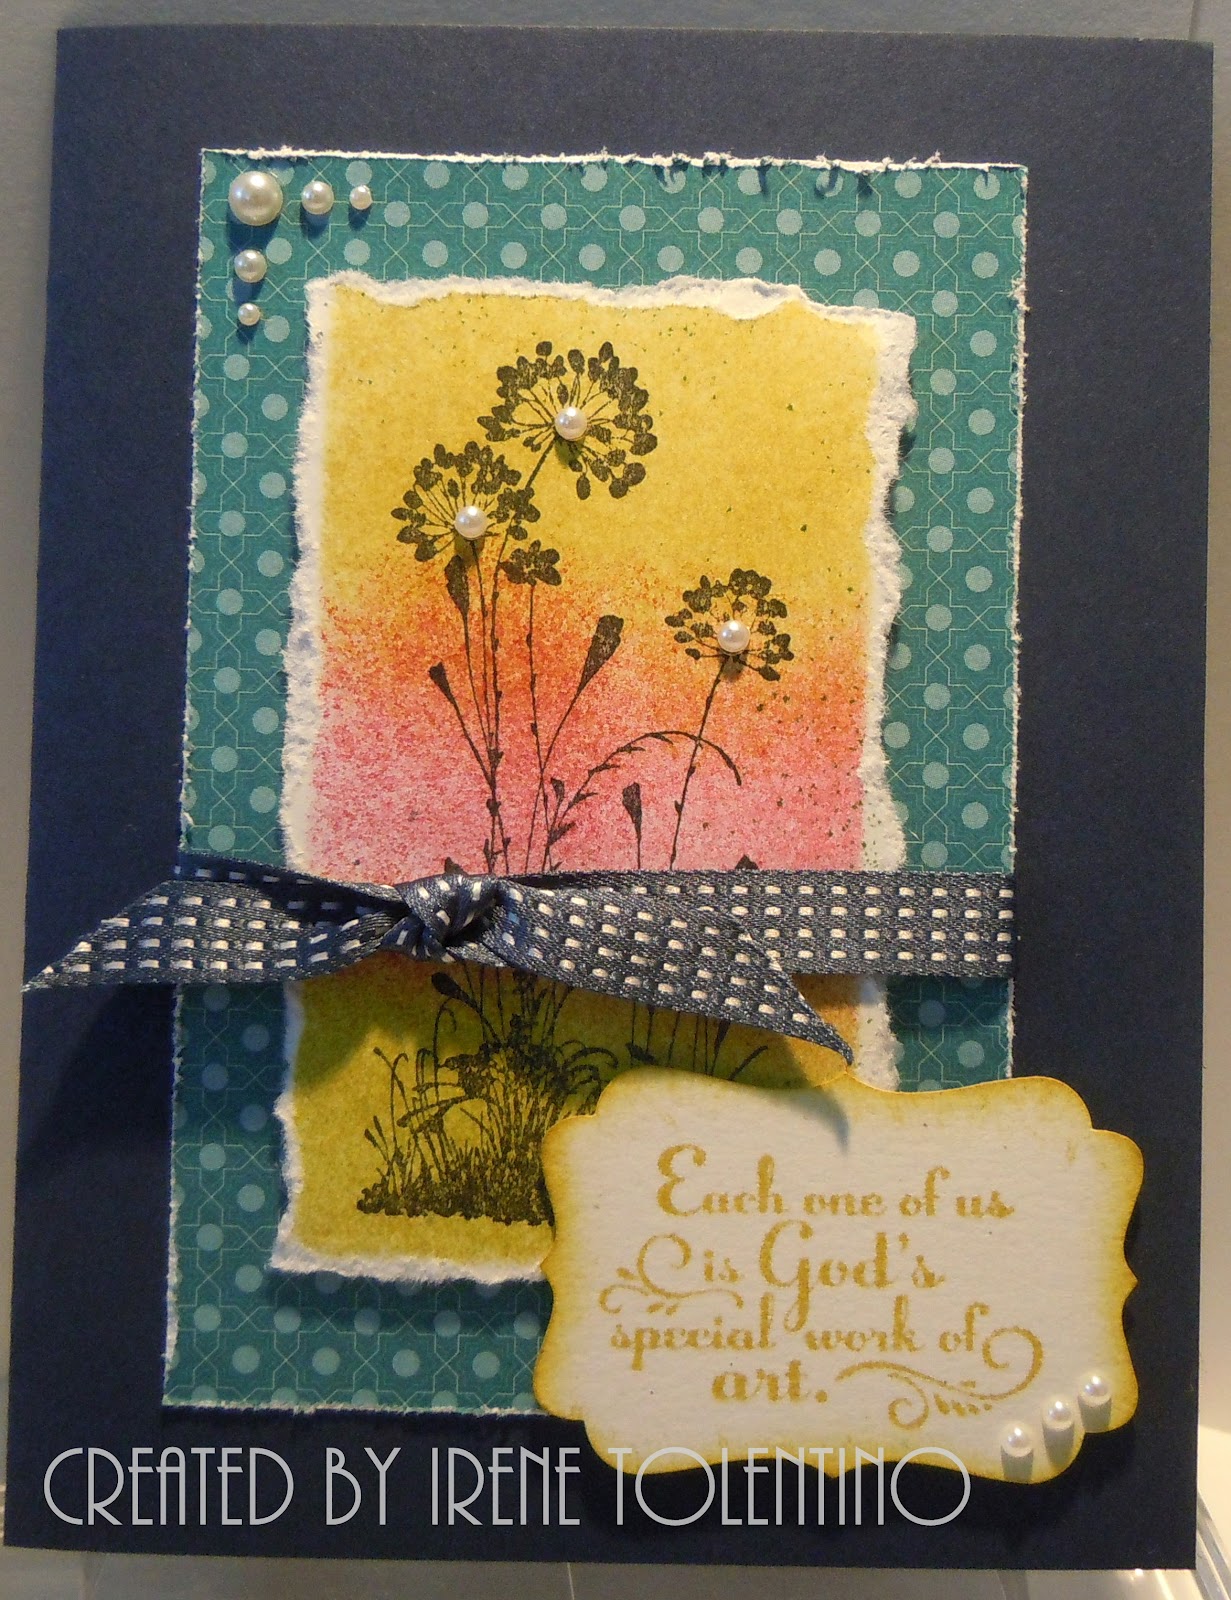
On this card I used the focal point I messed up when I was working on the first card.  I sponged out of the mask so ink was all over my card.  The solution, tear the sides and do a different layout!  The card base is Midnight Muse (blue) and I like it with Summer Starfruit (yellow).  The printed blue panel is from the designer paper stack called Festival of Prints.


On this card I used another image from the Serene Silhouette set.  I stamped the image directly on the printed paper, also from Festival of Print paper stack, with midnight muse ink.  Love that paper, just had to use it.  The rhinestones were colored with navy blue sharpie.


This is the same as the previous card except I used Early Espresso for the card base and added butterflies for embellishments.  Again, I used the white butterflies already die cut and this time colored them with midnight muse ink.  I really like how this one turned out.


This is the clean and simple one.  No sponging!!! I really like midnight muse and summer starfruit together.  Who would have thought I would use so much blue ribbons.  The Stampin'Up promotion in September was free ribbon spool for every forty dollar purchase and that's the only reason I have midnight muse ribbon.  And I found I really like that color.


Here's the group shot!  You always need a group shot.


This is how I packaged them.  A simple clear box with a ribbon and tag.  All six cards and envelopes fit in the box.

All supplies are from Stampin'Up except for the clear box.

Cheers!

Friday, October 5, 2012

Orchids - Psychopsis Mariposa & Bulbophyllum Makoyaanum

I found these two exotics, surprisingly, in a shopping center flower stall that only sells orchids.  Surprising in the sense that these type of stores normally just carry different varieties of  the "standards" - dendrubiums, phalaenopsis, cattleyas, cymbidiums or oncidiums.

This is a Psychopsis Mariposa, very striking and odd at the same time.  I heard some people call them spider orchids but for me the name mariposa is more fitting because in my dialect mariposa means giant moth, and these one looks just like a giant moth.  The size is pretty impressive, it's about 8 inches to the tip of the "antennae".


This other one, I have never seen before.  I asked the seller if it is an orchid and he said yes.  He said most people call them daisy orchid for apparent reason but the scientific name is Bulbophyllum Makoyaanum.  He also mentioned that unlike daisies, each "petal" is a flower.  So this particular one has eleven flowers in one stem.  Compared to the Psychopsis Mariposa, the Bulbophyllum Makoyaanum is tiny, about 2 inches in diameter.  It's not the best shot but the best I can get with my cell phone camera.  The smell is not very pleasant either.  Most orchids, not all, if they have a scent usually smell like vanilla or different variations of vanilla scents.


I didn't buy either one because plants die on my watch and my Mom just left for a four-week vacation.  A lot can happen in four weeks!!!  When she gets back and if they have another blooming Psychopsis Mariposa, I'll get her one and I can come over whenever I want to see the flower.

Thursday, October 4, 2012

Name Tag

I created this name tag for my upcoming group meeting.  I used MDS2, a digital design software by My Digital Studio which is one of Stampin'Up's product line.  MDS2 is a recent upgrade and there are tons of new design tools and digital contents.  I think I went a little over board trying a lot of new stuff and cramming so much elements in such a small project.  The tag itself measures 3" x 2".  I made it to fit in a plastic sleeve hanging from a lanyard.


I'm really excited that I figured out how to use the splatter tool which enabled me to have the sponge look.  I was also able to changed embellishment color which is another new feature of MDS2.  The software is very intuitive and user friendly.

The layout is not quite balanced but I grouped some elements together and I had so much layers that making changes became tedious, I decided to leave it alone.  There are elements that don't even show.  As I was adding embellishments and layers of papers and brush sets some things just got buried.  I'll try again another day with a different approach.


Wednesday, October 3, 2012

Halloween Collage Swap

I am participating in a swap with my stamping friends that is a little different from our normal swaps.  Instead of creating cards, we are making little squares that will be made into a collage.  The important requirement is that the squares have to be 1-3/8" by 1-3/8" or use the Stampin' Up Square Scallop Punch.

When I agreed to participate, I thought I can easily get this done since I already had a idea floating in my head.  The one with a tiny tag was my original idea but I wasn't too crazy about it.  The one on the left was my second try.  Then the spooky bats, first in green and then in gray.  I really liked the bats but the bat punch was retired last year so I can't use it.


The final design I decided to go with is really simple and easy to mass produce.  I need twenty squares and they are due October 15th.  I finished them today in, like, an hour.  It's really a simple process.  I cut 1-1/4 x 1-1/4 squares from white cardstock and stamped the spider in black Stazon and "Crawly" in Calypso Coral.


Then I sponged Wisteria Wonder around the squares, covering almost all the white cardstock.


Next, I glued the squares to punched out scallop square.


And now I'm done!!!  Way ahead of schedule.  Stay tuned for the next collage swap which is a Christmas/Holiday theme.

All stamps, inks and cardstocks used were from Stampin'Up.

Altered Notebooks

I'm a sucker for pretty papers - cardstocks, handmade paper, coordinating designer papers, you name it.  I can't resist buying papers when I see a design or color I like.  The problem is I don't want to cut them up and use them so I end up hording beautiful papers.

Recently, I challenged myself to use more papers on my projects.  I picked my current favorites and created something with them.  One of the best way to use beautiful papers is altered notebooks.  I still prefer handwritten notes in spite of all the available fancy gadgets around and I always carry a notebook in my purse.  

Today, I'm sharing my notebooks with you.
I love these mini notebooks.  I carry one in my purse for when an inspiration strikes me.  I make notes for future projects or blog posts but I don't use them for grocery list!  I also altered the pens to coordinate with the notebooks.  While I'm at it, I made a simple pen cupholder.


These are the regular size composition books.  I kept them simple so I can add monograms later.  If I give them away, I'll add the recipient's initials.  If not, they'll have my initials!!!  These too, have matching pens.


This is a spiral notebook from Staples.  I added the tabs so I can separate my notes.  And the coordinating pen just makes writing so much more fun.


This is the inside cover.  I added post-it notes and a small pocket for stamps and business cards.  The big pocket is part of the notebook.  I kept it as is although  a blank canvas like that is screaming to be embellished!!


All rubber stamps, cardstocks and Designer Series Papers are from Stampin' Up.

Monday, October 1, 2012

Post It Note Pinwheels

Do you ever get those days at work when you just don't feel like working or are not getting anything done no matter how hard you tried?

When that happens to me, I usually organize my work space, sort my paper clips and binder clips, go through my desk drawers, or whatever mindless task I can find.  It was on one of those kinda day when I found my stash of  neon Post It notes.  Our office normally uses the plain yellow ones so finding these bright and colorful stash was a treat for me.  I can't remember when and how I got them.

What to do, what to do????  How about pinwheels?

I ripped open the clear plastic around them and laid them out on my table.  I randomly paired two different colors together so each side had a different color.  I snipped all four corners and folded the corners to meet in the center and used push pins to attached them to the erasers at the end of pencils.  I put them in my pen/pencil cup, they looked nice but they won't spin.  So I unpinned them from the erasers and stuck them on my board.

I think they look better scattered on the wall.


After that, I was ready to get back to my financial statements, crunching numbers, debits and credits..........