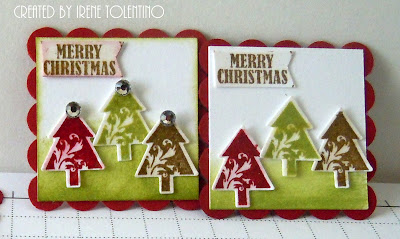
I started by cutting 2" strips of white and cherry cobbler cardstocks to speed up stamping and punching my elements. I punched out 30 scallop squares in Cherry Cobbler. From white cardstock, I punched 1.25" squares for the panel. I stamped the Christmas trees in cherry cobbler, lucky limeade and soft suede and the sentiments in soft suede.
Then I brushed Crystal Effects all over the Christmas trees and the sentiments to give the images a glossy, lacquered look. I used to do this every time I hand cut my stamped images, it gives the cardstock more weight and as you cut, the scissors just glide around the edges; makes fussy cutting less stressful. The key is to let the product dry completely. I usually let mine sit for at least half hour. I'm sure you can speed up the drying time with a heat gun but I've never tried it.
Once they're dry, I punched out all 90 Christmas trees.
I cut the sentiments by hand to create a tiny banner.
Then I sponged lucky limeade at the bottom of the white panel. Now I'm ready to assemble.
The one on the left was my original concept - sponged some color on the banner but in the end I decided to keep 'em "clean". .I also wanted some bling but the smallest rhinestones I have are still too big for the trees, so no bling after all. The one on the right is the final design I submitted, clean and simple.
Here they are ready to go. That's thirty 1-3/8" squares!
I should get my swaps back around the 20th. I will share the collage when I put them together.
Thanks for stopping by. Until the next post .............. Cheers!!!


No comments:
Post a Comment